
“ StableDiffusion-webUI环境配置、部署、汉化、扩展超详细步骤 || 服务器Linux Ubuntu/本地Windows || 比官方安装更高自定义度 || anaconda虚拟环境下 ”
目录 一、代码下载 以下指令用git下载代码(可能不能直接跑通,后续需要修改一些代码,见“ 四、代码修改”部分) 1. 下载 stable-diffusion-webui 仓库 2. 下载其他仓库 二、环境配置 0. 安装anaconda、CUDA、cuDNN 1. 建立并激活新 conda 环境 2. 安装 requirements.txt 中的依赖包 3. 安装其他依赖包 三、运行 四、代码修改 五、其它 主要参考:https://zhuanlan.zhihu.com/p/639164507https://zhuanlan.zhihu.com/p/639164507 注:windows、linux系统均适用
一、代码下载
以下指令用git下载代码(可能不能直接跑通,后续需要修改一些代码,见“ 四、代码修改”部分)
1. 下载 stable-diffusion-webui 仓库
git clone https://github.com/AUTOMATIC1111/stable-diffusion-webui.git
cd stable-diffusion-webui
2. 下载其他仓库
webui 仅仅是一个外层界面包装,核心功能是通过其他仓库(或以仓库的形式、或以安装包的形式)支撑的。其他仓库需放在 ./repositories 文件夹下:
mkdir repositories
然后依次下载以下仓库,并切换到合适的版本以避免可能的版本适配问题: stablediffusion
git clone https://github.com/Stability-AI/stablediffusion.git ./repositories/stable-diffusion-stability-ai
git -C ./repositories/stable-diffusion-stability-ai checkout cf1d67a6fd5ea1aa600c4df58e5b47da45f6bdbf
taming-transformers
git clone https://github.com/CompVis/taming-transformers.git ./repositories/taming-transformers
git -C ./repositories/taming-transformers checkout 24268930bf1dce879235a7fddd0b2355b84d7ea6
k-diffusion
git clone https://github.com/crowsonkb/k-diffusion.git ./repositories/k-diffusion
git -C ./repositories/k-diffusion checkout c9fe758757e022f05ca5a53fa8fac28889e4f1cf
CodeFormer
git clone https://github.com/sczhou/CodeFormer.git ./repositories/CodeFormer
git -C ./repositories/CodeFormer checkout c5b4593074ba6214284d6acd5f1719b6c5d739af
BLIP
git clone https://github.com/salesforce/BLIP.git ./repositories/BLIP
git -C ./repositories/BLIP checkout 48211a1594f1321b00f14c9f7a5b4813144b2fb9
二、环境配置
我在服务器(ubuntu18.04.6,Linux5.4.0,x86_64,RTX 2080Ti)上安装了CUDA11.8、对应版本的cuDNN、anaconda最新版(Anaconda3-2023.07-1-Linux-x86_64),在虚拟环境中安装了对应版本的pytorch 在本地(windows11 1650显卡)上安装了CUDA11.7、对应版本的cuDNN、anaconda最新版,在虚拟环境中安装了对应版本的pytorch 均可运行,但本地显存不足,无法加载模型正常使用 Linux、windows操作系统均可用下述过程配置环境。 官网推荐python版本python 3.10.6
0. 安装anaconda、CUDA、cuDNN
见: Windows10/11系统下YOLOv5超详细配置过程(GTX1650、CUDA10.2)_yolov5环境配置_Wontoner的博客-CSDN博客一、CUDA&cuDNN1.官网下载CUDA2.下载cuDNN注意与CUDA版本相匹配3.安装CUDA3.1更改temp_path3.2自定义选项可以全选,因为里面的一些项目我已经安装,故未勾选3.3选择安装位置建议选择默认安装位置,但我选择自定义安装位置默认位置:我的安装位置:3.4安装结果:4.更改环境变量:在系统变量Path的末尾添加:%CU…_yolov5环境配置https://blog.csdn.net/Wontoner/article/details/115469474?spm=1001.2014.3001.5502做到文章步骤3.2即可。
1. 建立并激活新 conda 环境
conda create -n py3106 python=3.10.6
conda activate py3106
2. 安装 requirements.txt 中的依赖包
conda install pytorch==2.0.0 torchvision==0.15.0 pytorch-cuda=11.8 -c pytorch -c nvidia
注:此处注意cuda版本要与计算机cuda版本一致 可在https://pytorch.org/get-started/previous-versions/寻找对应命令
pip install tb-nightly
pip install -r requirements.txt
3. 安装其他依赖包
pip install ftfy regex tqdm
conda install git
pip install git+https://github.com/openai/CLIP.git
pip install open_clip_torch xformers --no-deps
这里不–no-deps的话,可能出现强制卸载torch的问题
pip install -r repositories/CodeFormer/requirements.txt
conda install pydantic==1.10.11
降级 以解决config问题 https://github.com/AUTOMATIC1111/stable-diffusion-webui/issues/11642
三、运行
nohup python webui.py --listen --enable-insecure-extension-access --xformers
若运行不成功,参考“四、代码修改”部分。
汉化等扩展功能见“五、其它”部分。
服务默认运行在 127.0.0.1:7860 上。
nohup: 即no hang up(不挂起), 当前交互命令行退出的时候,程序还在运行。
如果部署在远程服务器上,想通过其他电脑的浏览器访问服务,需要添加 –listen 参数,这样服务运行在服务器的 0.0.0.0:7860 上,在客户端浏览器输入 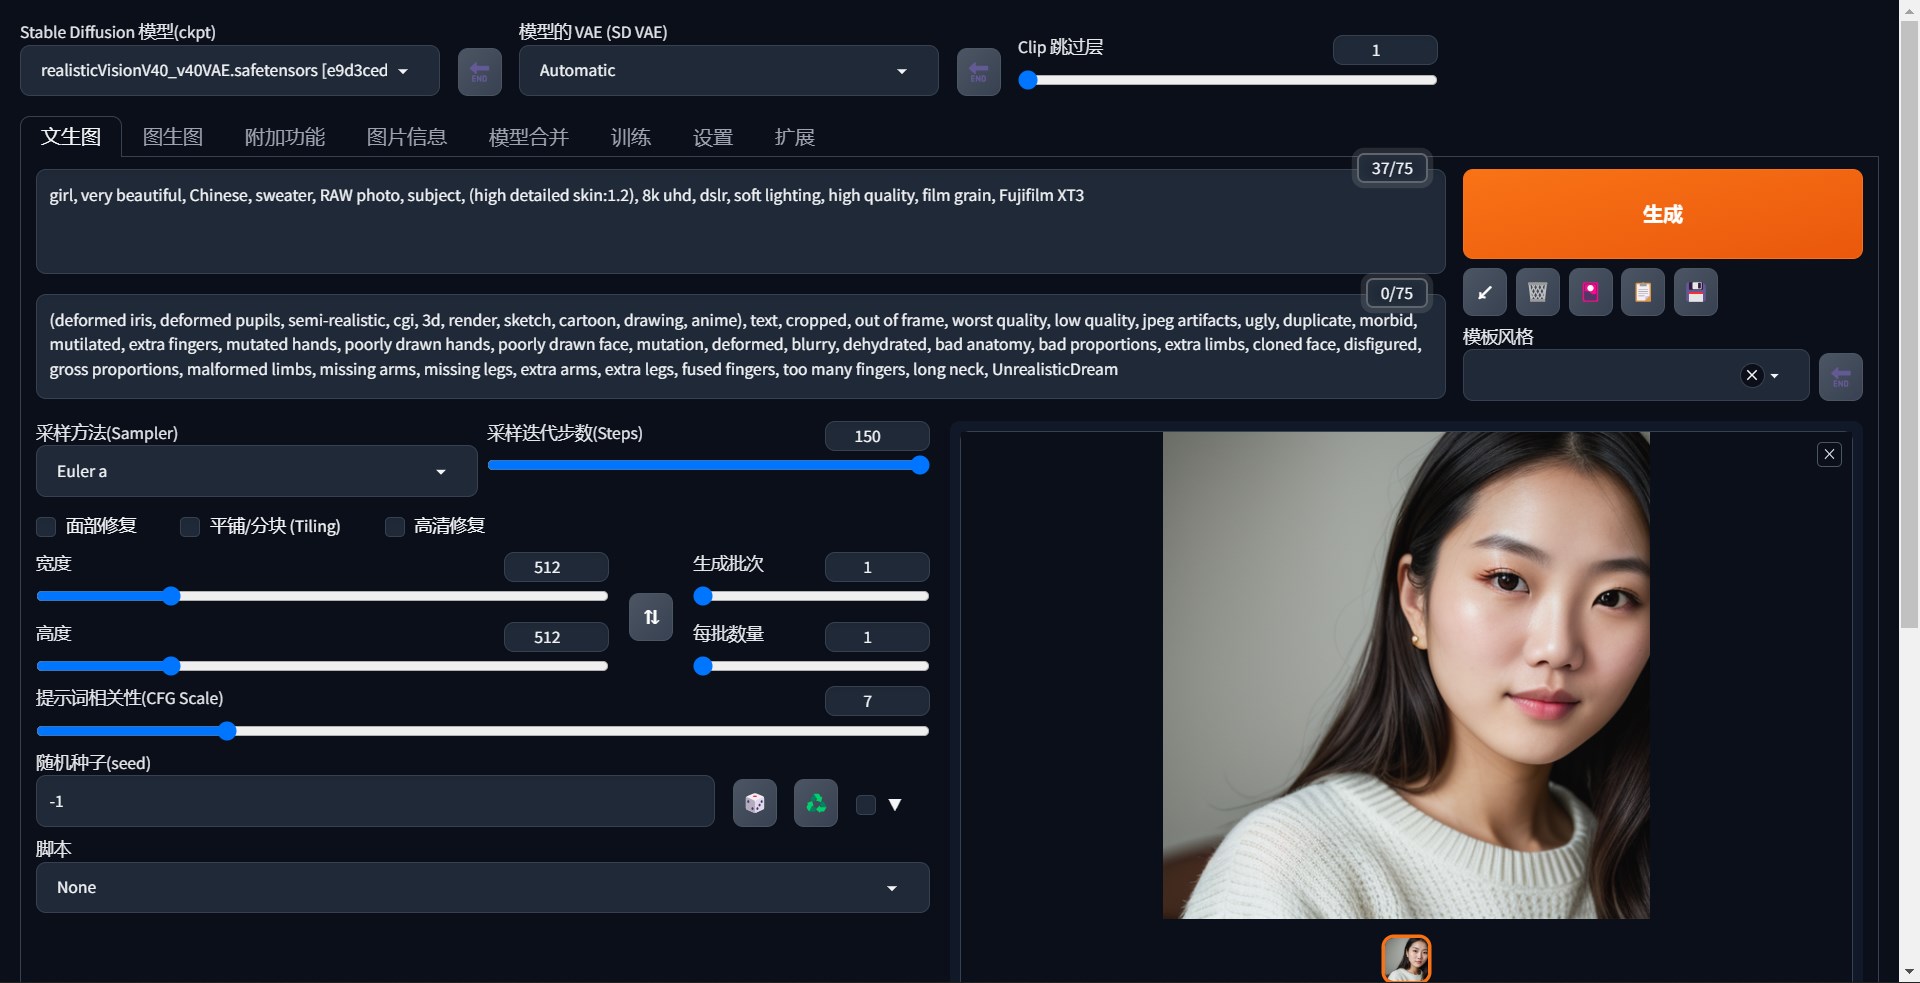
四、代码修改
如果使用官方代码,运行不成功,可能需要修改以下代码: 1. stable-diffusion-webui\repositories\stable-diffusion-stability-ai\ldm\models\diffusion\ddpm.py 修改后:
# from pytorch_lightning.utilities.distributed import rank_zero_only
from pytorch_lightning.utilities.rank_zero import rank_zero_only
2.
stable-diffusion-webui\extensions-builtin\LDSR\sd_hijack_ddpm_v1.py
同上
3.
stable-diffusion-webui\repositories\CodeFormer\facelib\detection\retinaface\retinaface.py
原本的样子:
 修改后:
修改后:
 4.
stable-diffusion-webui\repositories\CodeFormer\facelib\utils\face_restoration_helper.py
问题同上
修改后:
4.
stable-diffusion-webui\repositories\CodeFormer\facelib\utils\face_restoration_helper.py
问题同上
修改后:


五、其它
1.开启面容修复功能(涉及代码修改)
参考 https://zhuanlan.zhihu.com/p/640264519https://github.com/AUTOMATIC1111/stable-diffusion-webui/discussions/10059https://github.com/AUTOMATIC1111/stable-diffusion-webui/discussions/10059
开启面容修复,首先,UI的设置页面中开启
然后
在文件stable-diffusion-webui\repositories\CodeFormer\facelib\utils\ face_restoration_helper.py中
 2.汉化
AI绘画stable diffusion webui汉化教程_肖坤的博客-CSDN博客AI绘画stable diffusion webui汉化教程https://blog.csdn.net/u010321872/article/details/130840482
3. 显示VAE模型选择、CLIP终止层数选择
百度安全验证https://baijiahao.baidu.com/s?id=1772123527433278103&wfr=spider&for=pc
4.模型下载网址
https://civitai.com/https://civitai.com/
sd模型下载到stable-diffusion-webui\models\Stable-diffusion文件夹下,刷新UI即可
2.汉化
AI绘画stable diffusion webui汉化教程_肖坤的博客-CSDN博客AI绘画stable diffusion webui汉化教程https://blog.csdn.net/u010321872/article/details/130840482
3. 显示VAE模型选择、CLIP终止层数选择
百度安全验证https://baijiahao.baidu.com/s?id=1772123527433278103&wfr=spider&for=pc
4.模型下载网址
https://civitai.com/https://civitai.com/
sd模型下载到stable-diffusion-webui\models\Stable-diffusion文件夹下,刷新UI即可
推荐阅读
每日一言
"<!doctype html> <html lang="Zh-cn"> <head> <meta http-equiv="Content-Type" content="text/html; charset=utf-8" /> <meta name="robots" content="noindex,nofollow"> <meta name="viewport" content="width=device-width, initial-scale=1.0, maximum-scale=1.0, user-scalable=no"/> <meta name="renderer" content="webkit"> <title>您请求的文件不存在!</title> <link type="text/css" rel="stylesheet" href="https://www.oick.cn/css/404.css" /> <link rel="shortcut icon" href="http://www.oick.cn/favicon.ico" type="image/x-icon" /> </head> <body> <div id="wrap"> <div> <img src="https://www.oick.cn/imgs/404.png" alt="404" /> </div> <div id="text"> <strong> <span></span> <a href="javascript:history.back()">返回上一页</a> </strong> </div> </div> <div class="animate below"></div> <div class="animate above"></div> </body> </html>"